
What Is a Scramble in Hiking (and How Does It Work)?
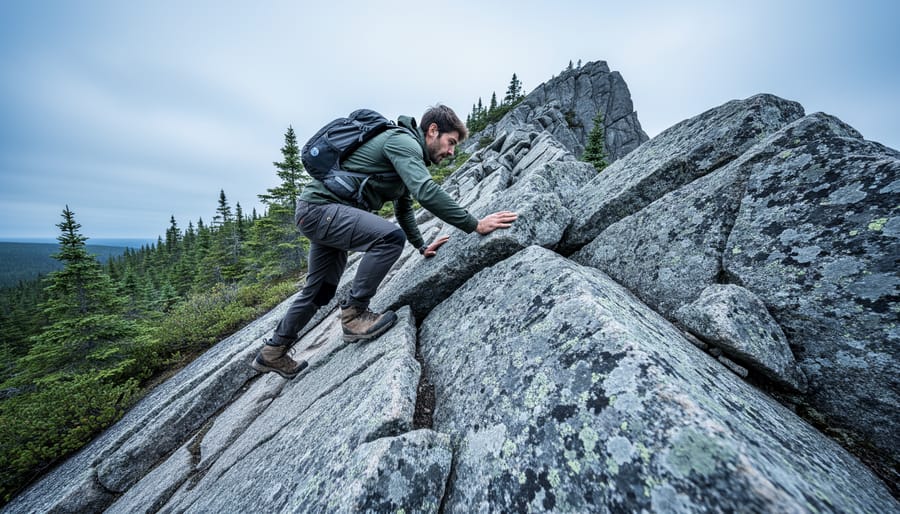
A scramble in hiking means you’re moving over steep, rocky terrain using both your hands and feet to safely navigate the route. Unlike regular hiking where you simply walk along a trail, scrambling requires you to pull yourself up over boulders, grip rock faces for balance, and sometimes move on all fours across rugged slopes where your feet alone won’t cut it.
The difference matters more than you might think. On Northern Ontario’s ancient Precambrian Shield, scrambles open access to breathtaking lookouts and remote wilderness areas that standard trails can’t reach. The Sleeping Giant’s Chimney Top, the quartzite ridges of Greenwater Provincial Park, and countless granite peaks across the region demand scrambling skills. These routes lie between comfortable hiking and technical rock climbing, occupying what experienced climbers call Class 3 terrain on the Yosemite Decimal System.
Understanding scrambling helps you prepare properly and assess whether a route matches your ability level. The shift from hiking to scrambling changes everything: the gear you carry, the pace you maintain, the weather conditions you can safely tackle, and the physical demands on your body. It also deepens your connection to the land. Many of these routes follow paths that Anishinaabe and Cree peoples have traveled for generations, reading the rock and respecting the power of these landscapes.
This guide explains what scrambling involves, how the terrain classification system works, what distinguishes scrambling from hiking and climbing, and the safety considerations you need before venturing onto Northern Ontario’s spectacular scramble routes.
What Scrambling Means in the Wilderness
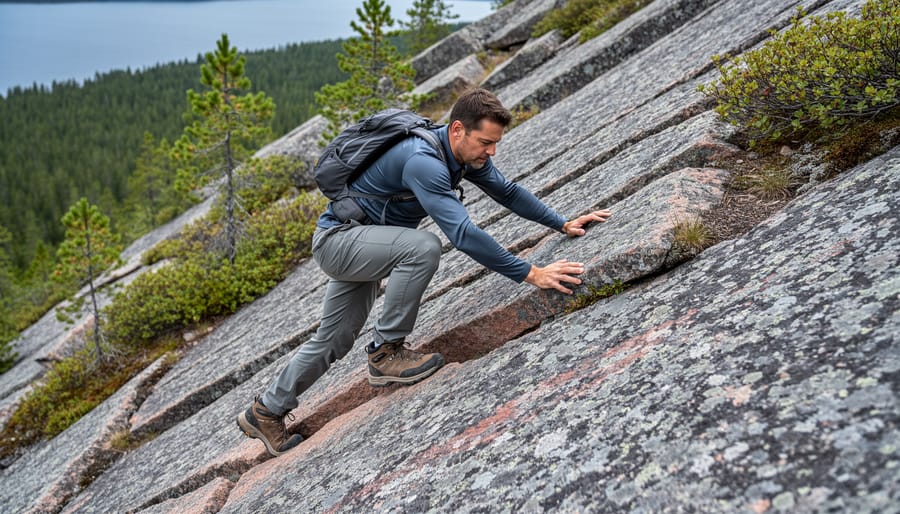
Scrambling sits in that thrilling space between walking a maintained trail and technical rock climbing. When you scramble, you’re using both hands and feet to navigate steep, rocky terrain, pulling yourself up over boulders, gripping rock faces for balance, and sometimes moving like a monkey up rough, angled slopes. Your hands shift from being idle companions to essential tools for upward progress and stability.
The physical movement feels fundamentally different from standard hiking. On a regular trail, your feet do the work while your hands swing free or steady trekking poles. Scrambling transforms you into a four-limbed climber, reading the rock for secure hand and foot holds, testing surfaces before committing your weight, and flowing from one natural feature to the next. You’re climbing without ropes or harnesses, relying on friction, balance, and your ability to choose a safe line up the rock.
- Scramble
- A section of terrain requiring hands and feet for safe navigation, typically on steep, rocky ground where balance and upward progress demand more than walking.
- Terrain Class
- A rating system (Class 1 through 5) that describes difficulty, where Class 1 is standard hiking and Class 3 represents the majority of scrambling routes.
- Hand-Over-Hand Movement
- The technique of using hands to pull yourself upward or maintain three points of contact while ascending steep rock.
- Exposure
- The degree of consequence from a potential fall, often increasing as terrain becomes steeper and drop-offs more severe.
Northern Ontario’s Precambrian Shield geology creates exceptional scrambling opportunities. These ancient rock formations, some of the oldest exposed bedrock on Earth, offer fractured granite faces, blocky ridgelines, and boulder-strewn slopes that demand hands-on navigation. The Shield’s characteristic pink and grey rock, shaped by glaciers and weathered by millennia, provides the textured, angular terrain where scrambling skills come alive. Routes here reward confident movement and respect for the raw, ungroomed wilderness.
How Scrambling Works on the Trail
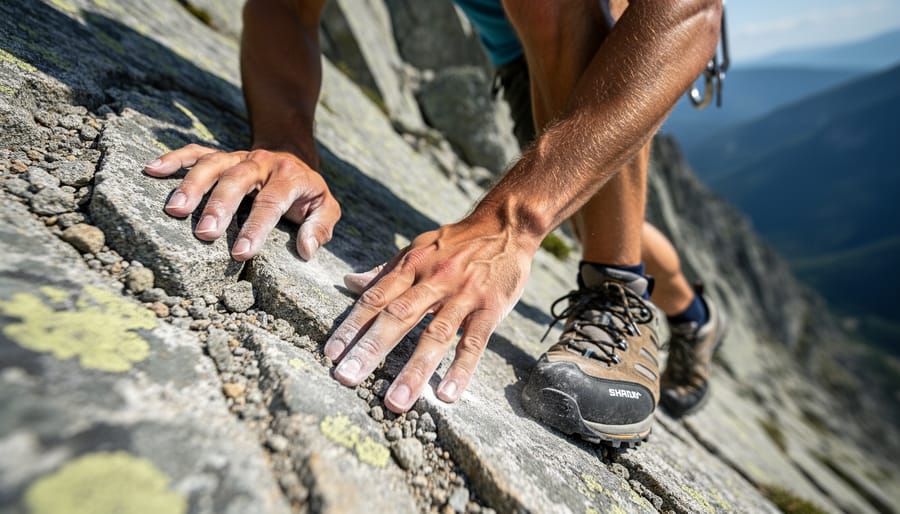
The moment you step off a maintained trail and encounter steep, rocky terrain, your entire approach to movement changes. Scrambling begins when walking alone won’t keep you safe, and you instinctively reach out to steady yourself against the rock face. This transition happens gradually, first one hand touches a boulder for balance, then you’re gripping edges to pull yourself upward, and soon you’re moving like a monkey up rough, steep, rocky terrain.
The core technique involves reading the rock surface before you move. Scan ahead for solid hand holds, ledges, cracks, protruding edges, and test each one by applying gentle pressure before trusting it with your full weight. Your feet need stable platforms too, whether flat surfaces or angled features that won’t shift when loaded. On Northern Ontario’s Precambrian Shield, the ancient granite often provides excellent friction, but loose lichen or wet conditions change everything.
Body positioning makes the difference between smooth progress and exhausting struggle. Keep your hips close to the rock face and your weight centered over your feet, letting your legs do the heavy lifting rather than hauling yourself up with arm strength alone. Your hands provide balance and stability more than brute force. As you climb, maintain that three-point contact rule: if you’re moving your right hand to a new hold, your left hand and both feet stay planted until the right hand is secure.
Movement should feel controlled and deliberate. Rush, and you’ll miss seeing that perfect foothold just to your left or grab a loose rock that seemed solid. Pause frequently to assess the next sequence of moves, especially on Class 3 sections where route-finding becomes part of the challenge. If a section feels beyond your ability or you can’t identify safe holds ahead, that’s the moment to turn back, Northern Ontario’s peaks will wait for another day when conditions or preparation align better with the terrain’s demands.
Types of Scrambling Terrain
Scramblers use a classification system borrowed from mountaineering to describe terrain difficulty, and understanding these ratings helps you choose routes that match your skill level. The Yosemite Decimal System breaks wilderness terrain into five main classes, with Class 1 through Class 4 covering everything from flat trails to exposed rock faces where a fall could be serious.
Class 1 is standard hiking, walking upright on established trails with minimal elevation gain or technical challenges. You’ll find this on most maintained paths through Northern Ontario’s boreal forests and along lakeshores. Class 2 introduces steeper ground, talus fields, and boulder-hopping where you might occasionally use your hands for balance, but the terrain doesn’t demand constant hand use. Think of scrambling up a steep slope of broken rock to reach a ridgeline viewpoint.
Class 3 is where true scrambling begins and where you’ll spend most of your time on scramble routes. Here you’re consistently using both hands and feet, choosing specific holds, and maintaining three points of contact as you climb. Many Class 3 routes lead to summits across the Precambrian Shield, where ancient granite and gneiss formations create natural staircases of cracks, ledges, and slabs. Exposure increases, you’re aware of the drop below you, but the holds are generally solid and plentiful enough that most people feel secure without a rope.
Class 4 terrain gets more serious. Hand and foot placements become smaller and less obvious, exposure is significant, and a fall could cause injury or worse. Some experienced scramblers carry a rope for Class 4 sections even if they don’t use it for protection. You might encounter a Class 4 move on an otherwise Class 3 route when reaching a rocky summit or navigating a particularly steep chute.
Routes rarely stick to one class throughout. A scramble to a Northern Ontario peak might involve Class 2 approach hiking through jack pine and lichen-covered bedrock, Class 3 scrambling up the main face, and a short Class 4 or even 5.1 climbing move to pull over the final summit block. Experienced scramblers describe routes this way, “mostly Class 3 with a few Class 4 moves”, giving you a realistic picture of what you’ll face on the Shield’s varied terrain.
When and Where Scrambling Is Used
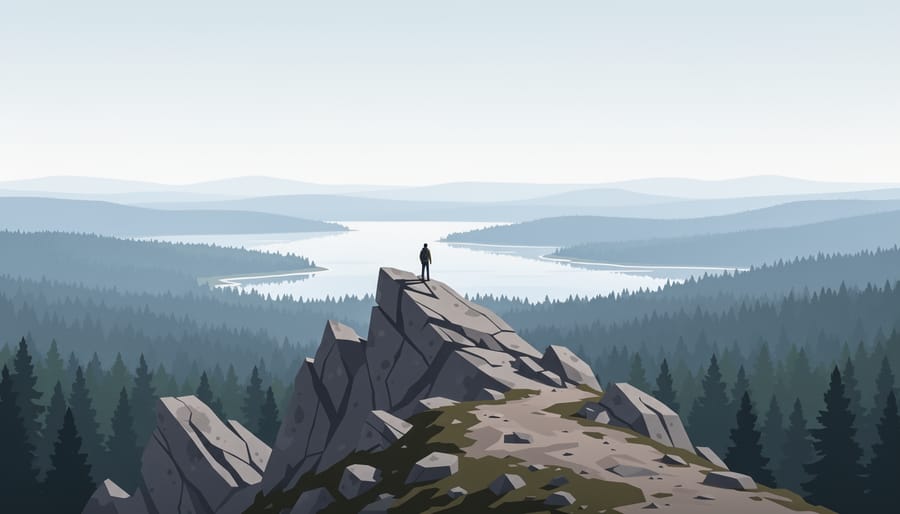
Scrambling situations arise wherever hiking trails meet steep, rocky terrain that demands more than footwork alone. You’ll encounter scrambles when popular routes lead to dramatic viewpoints perched on cliff edges, where the final approach requires pulling yourself up rock ledges. Summit routes frequently include scramble sections, especially peaks rising from rugged Shield geology, where the last hundred vertical meters might shift from Class 2 trail to Class 3 hand-and-foot navigation over exposed granite slabs.
Off-trail backcountry travel in Northern Ontario often requires scrambling skills. When you’re navigating cross-country to reach hidden waterfalls cascading down steep rock faces, or accessing remote lakes cradled in rocky bowls, you’ll likely face scramble terrain. These routes don’t appear on trail maps but reward those willing to move through challenging landscapes.
The Superior Hiking Trail system includes several sections where hikers scramble up rocky outcrops to reach stunning Lake Superior overlooks. Provincial parks such as Killarney and Lake Superior Provincial Park feature waterfall approaches that transition from maintained paths to scramble routes over Precambrian rock formations. The pink and grey quartzite ridges characteristic of the region create natural scramble corridors.
Traditional pathways used by Indigenous peoples for centuries often traverse terrain modern hikers would classify as scrambles. These routes followed practical lines through the landscape, crossing ridges, accessing fishing sites, connecting seasonal camps, and required confident movement over rock. When you scramble these historic routes today, you’re following navigation wisdom refined over generations.
Whether you’re working toward a windswept summit view, approaching a thundering cascade tucked in a granite gorge, or exploring backcountry landscapes where trails fade into raw wilderness, scrambling opens access to Northern Ontario’s most spectacular terrain. A scramble hiking guide can help you identify suitable routes and prepare for the mixed terrain you’ll encounter across the region’s vast Shield country.
The Difference Between Hiking, Scrambling, and Rock Climbing
The boundary between walking a trail, pulling yourself over boulders, and clipping into ropes is not always obvious when you’re standing at the base of a rocky slope in Sleeping Giant Provincial Park. Recognizing where one activity ends and the next begins helps you prepare properly and know when you’ve moved beyond your comfort zone.
Hiking is the foundation, you’re walking upright on your feet, following a defined trail whether that’s a groomed path or a backcountry route marked with cairns and blazes. Your hands might steady you against a tree or grip trekking poles, but they’re not bearing your weight or pulling you upward. Most trails in Northern Ontario’s provincial parks and conservation reserves fall into this category, even when they’re steep or rough underfoot.
Scrambling enters the picture when the terrain tilts up and the rock demands more. You plant your hands on boulders and pull yourself higher, pick footholds between cracks, and move with a forward lean that shifts your center of gravity. Your hands become tools for propulsion and balance, not just steadying aids. There are no ropes, harnesses, or protection systems, you’re relying on friction, body positioning, and route-finding to stay safe on exposed rock.
- Hiking: boots, trekking poles optional; maintained or marked trails; minimal technical skill; no safety systems needed
- Scrambling: sturdy boots with grip, gloves optional; steep rock, talus fields, exposed ridges; moderate route-finding and body awareness; no ropes, self-reliance paramount
- Rock climbing: harness, rope, belay device, protection hardware; vertical or near-vertical faces; advanced technical skills including knot-tying and anchor-building; rope and belay systems protect against falls
Rock climbing pushes beyond scrambling terrain into angles where a fall means serious injury or worse without protection. Climbers tie into ropes, set anchors, and use belay systems where one person controls the rope to catch their partner if they slip. The rock might be vertical or even overhanging, and moves require specific techniques, crimping tiny edges, smearing rubber on smooth slabs, or jamming hands into cracks.
The transition between these activities is gradual rather than sharply defined. A scramble route might include a short section of easy fifth-class climbing, or a hiking trail might have a brief scramble over a rock band. When you find yourself hesitating, looking down and feeling exposed, or wishing you had a rope, you’ve likely crossed into terrain that demands more preparation or a different approach.
Safety and Preparation for Scrambling
Preparing for scrambling means recognizing it as a step up from trail hiking and equipping yourself accordingly. Start by building leg and core strength, squats, lunges, and balance exercises prepare you for the uneven weight shifts and sustained effort required on steep Shield rock. Your cardiovascular fitness matters too, since scrambles often involve continuous uphill movement at altitude with a pack.
Footwear makes or breaks a scramble. You need hiking boots with aggressive tread and ankle support, not trail runners. The rubber must grip granite when wet, and the sole should be stiff enough to edge on small holds without flexing. Gloves can protect your hands on sharp rock, though many scramblers prefer bare hands for better feel. Review our packing tips to ensure you carry water, snacks, a headlamp, and a basic first-aid kit, scrambles take longer than expected.
Before heading out, contact the relevant forest district office or provincial park. Talk to a ranger to find out what forest, park, or district you need and go to the website where you should be able to find a phone number. Rangers provide current trail conditions, recent rockfall reports, and route beta that online sources miss. They’ll also clarify access restrictions on Indigenous lands, many scramble routes cross treaty territories or pass sacred sites that require respectful conduct or advance permission.
Weather transforms scrambling risk. Rain makes Shield granite slick and treacherous. Fog obscures route-finding on open rock faces. Check the forecast before you leave and turn back if conditions deteriorate. Follow core hiking safety tips: tell someone your route, carry the Ten Essentials, and practice Leave No Trace by staying on durable rock surfaces rather than trampling fragile lichen.
Know your limits. If a section feels beyond your ability, exposure scares you, holds seem too far apart, or you’re breathing hard from stress rather than exertion, retreat is the right call. Scrambling should challenge you, not endanger you. Approach Northern Ontario’s rugged terrain with respect for both the land and the Indigenous culture that has navigated it for millennia.
Frequently Asked Questions
What is a scramble?
A scramble means you’re moving yourself using your hands and feet, pulling yourself up over rocks or walking like a monkey up rough, steep, rocky terrain. It’s a walk up steep ground where you need your hands for balance and propulsion, not just your feet.
What is the difference between a hike and a scramble?
A class 1 route is what we call hiking, simply walking along a trail using only your feet. Scrambling begins when the terrain steepens and you need to use your hands to safely navigate rugged, rocky ground, typically class 2 or 3 terrain.
What is the difference between hiking, scrambling, and rock climbing?
Hiking uses feet only on maintained trails. Scrambling adds hands on steep, rocky terrain without protective equipment. Rock climbing requires ropes, harnesses, and belay systems for vertical faces where a fall would be dangerous.
How do you know if a route involves scrambling?
Experienced scramblers often refer to routes using class ratings such as “class 3 terrain with the odd class 4 move, and one 5.1 section.” Talk to a ranger to find out what forest, park, or district you need and go to the website where you should be able to find a phone number for current route conditions.
These questions come up repeatedly because scrambling sits in that middle zone where hikers realize they need new skills. Northern Ontario’s Shield country presents plenty of opportunities to encounter scramble sections, especially on routes to high viewpoints or waterfall approaches. Understanding the distinctions helps you prepare properly and make smart decisions about adventurer safety when the trail turns vertical.
Scrambling opens up Northern Ontario’s wild backcountry in ways that standard trail hiking simply can’t match. The region’s ancient Precambrian Shield, carved by glaciers and shaped over billions of years, creates natural scrambling routes that reward adventurous visitors with breathtaking vistas, hidden waterfalls, and a genuine sense of discovery. You don’t need technical climbing skills or expensive gear to start; a pair of sturdy boots, basic route research, and respect for the terrain will get you there.
If you’re new to scrambling, begin with easier Class 2 or Class 3 routes where the challenges are manageable and the consequences of a misstep are low. Build your confidence on shorter sections before committing to full-day scrambles. Pay attention to weather conditions, know your physical limits, and always follow Leave No Trace principles to protect the fragile ecosystems and cultural sites that make this landscape so significant.
Northern Ontario’s Shield geology offers scrambling experiences you won’t find elsewhere in Canada. Approach these routes with humility, preparation, and a commitment to environmental sustainability. The rocks have been here for eons, treat them, and the lands of the Indigenous peoples who know them best, with the respect they deserve.
